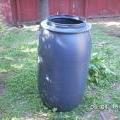
 We have been planning on setting up rain barrels in our yard for some time now, but it was the recent weather report, predicting one more rainshower, that spurred us to get moving in time to catch it.
To the left is a picture of the plain 65-gallon barrel we bought for our project. It is possible to purchase complete and ready-to-use rain barrels for about $100, but it was our preference to re-purpose a used barrel if possible. We found a place in San Jose that sells all sorts of barrels, including this large plastic barrel that was used to ship olives in. They cost about $45, and for less than $10 in hardware and in only an hour or two, we were able to convert both into functional rain barrels.
We didn't have any practical experience with making rain barrels, so we consulted a handy "How to make a rain barrel" guide on the internet. Some pictures of our project appear below.
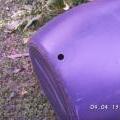
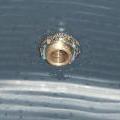 The first step in the barrel-construction process is to cut a small hole in the base of the barrel, as close to the bottom as is practical. If you have purchased fittings with a 3/4" interior dimension, then a 1" hole should about do the trick. Once the hole is cut, slide the spigot in and afix it from the inside using a rubber washer, a ~brass~ nut and some silicone. (An iron nut will rust and your barrel will leak) This means someone will have to wriggle into the barrel. The picture to the right shows the final result inside the barrel.
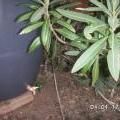
The overflow valve goes in much the same way. We used a threaded valve so that we could attach a length of hose to the barrel and route the excess water away from the house. This is an added benefit of the project; it is much easier to control where the excess water comes out using a hose compared to the options available for a regular downspout.
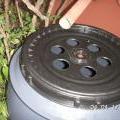
Getting the water into the barrel is easy. We just cut some large holes in the top of the barrel with a big hole saw and covered the whole thing with some large-grain wire mesh. After that, we raised our downspout and positioned it so that it would deposit the rainwater on the top of the barrel. Ta-da! All done!
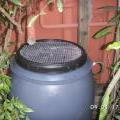 | 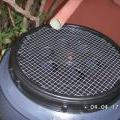 |  |  |
As predicted, it rained soon after we installed our new rain barrels. It didn't rain very much, but we still collected a lot of water. We discovered that a lot more water comes down on one side of the house than the other. It doesn't seem like it will matter too much, though, as the barrels fill up pretty quickly with only a little bit of rain. So far they're working well with no leaks or problems of any sort. This was a fun and easy project; it will help us save water, and we were also able to re-purpose a used barrel that might have otherwise ended up recycled or discarded.
- Log in to post comments